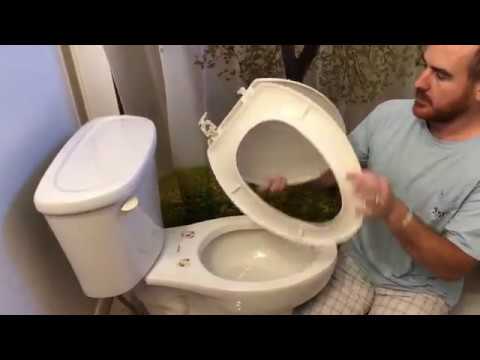
How to Fix a Broken Toilet Seat Cover can be more than just an eyesore—it can make your bathroom uncomfortable and even unsafe to use. But before you rush to replace the entire seat, what if you could fix it yourself quickly and easily?
You don’t need to be a handyman or spend a fortune. With just a few simple tools and steps, you can restore your toilet seat cover to good shape and save time and money. In this guide, you’ll learn exactly how to fix common cracks, loose hinges, and other issues, so you can enjoy a secure and comfortable bathroom experience again.
Ready to tackle the repair? Let’s get started!
Assessing The Damage
Assessing the damage to your broken toilet seat cover is the first step in fixing it. This helps you decide the best repair method. Careful inspection reveals the problem’s size and type. Some damages are simple and easy to fix. Others may need more attention or replacement.
Minor Cracks And Chips
Minor cracks usually appear as thin lines on the seat. Small chips show as tiny missing pieces or rough edges. These damages do not affect the seat’s function much. They can often be repaired with glue or epoxy. Clean the area well before applying any fix. Let the adhesive dry fully for a strong bond. Sand the surface lightly to smooth out rough spots.
Severe Breaks And Shattered Seats
Severe breaks cause large cracks or broken parts. Shattered seats may have pieces completely separated. These damages weaken the seat and make it unsafe. Repairing large breaks is difficult and less reliable. Replacing the seat cover is usually the safer choice. Measure your toilet bowl to buy the correct size. Choose a sturdy seat made from quality materials.
Gathering Materials
Fixing a broken toilet seat cover starts with gathering the right materials. Having everything ready makes the repair faster and easier. It also helps to get a neat and lasting fix. Below are the key supplies you will need to collect before starting.
Cleaning Supplies
Clean surfaces help adhesives stick better. Use rubbing alcohol or a mild cleaner. Avoid oily or greasy cleaners that leave residue. Have a clean cloth or paper towels ready. Make sure the broken area is dry before repair.
Adhesives And Repair Kits
Choose a strong adhesive like two-part epoxy or super glue. Some repair kits come with filler putty to fix cracks. Baking soda can be mixed with super glue for better bonding. Pick a product designed for plastic or bathroom use.
Tools For Repair
Gather basic tools like a small clamp or rubber bands to hold pieces together. Sandpaper helps smooth rough edges after fixing. A utility knife can remove loose fragments. Have gloves on hand to protect your skin during the repair.
Preparing The Toilet Seat
Preparing the toilet seat is a key step before fixing it. Proper preparation ensures the repair lasts longer. It also helps the adhesive or repair material stick well. Take your time and follow these simple steps for the best results.
Start by cleaning the seat thoroughly. Removing dirt and grime improves adhesion. Then smooth the damaged area to make the repair even. These small actions make a big difference.
Cleaning And Drying
Use a cleaner or rubbing alcohol to wipe the entire seat. Focus on the cracked or broken part. Remove all dust, oil, and dirt. A clean surface helps glue stick tightly.
After cleaning, dry the seat completely. Use a soft cloth or allow it to air dry. Moisture can weaken the repair. Make sure no water remains on the seat.
Smoothing The Damaged Area
Check the broken area for rough edges or loose pieces. Gently sand these parts with fine sandpaper. Smooth surfaces help the adhesive bond better.
If small fragments are loose, remove them carefully. Avoid making the damage worse. A clean, smooth surface gives the repair a strong base.
Repairing Minor Cracks
Repairing minor cracks in a toilet seat cover saves money and time. Small cracks can weaken the seat, but do not always need full replacement. Fixing these cracks involves using adhesives to bond broken parts tightly. Proper repair extends the seat’s life and improves safety.
Always clean and dry the cracked area before starting. This step ensures the adhesive sticks well. Use gentle cleaning agents like rubbing alcohol for the best results. Avoid water or oily cleaners that reduce bonding strength.
Using Epoxy Adhesive
Epoxy adhesive is strong and ideal for plastic toilet seats. Mix the two parts of epoxy as per instructions. Apply the mixture carefully over the crack. Press the cracked edges together firmly. Epoxy sets slowly but creates a lasting bond. Avoid moving the seat until fully cured.
Applying Super Glue With Baking Soda
Super glue works fast but is weaker alone. Adding baking soda strengthens the bond instantly. First, apply super glue to the crack. Then sprinkle baking soda on the glue while still wet. The mixture hardens quickly and fills gaps well. This method suits small cracks and quick fixes.
Clamping And Curing
Clamping holds parts tightly during curing. Use a clamp or heavy objects to press the cracked pieces together. Keep steady pressure for the full curing time. Check adhesive instructions for the exact time needed. Removing clamps too soon may weaken the repair.
Fixing Loose Or Detached Covers
A loose or detached toilet seat cover can be annoying and unsafe. It causes wobbling and makes the seat uncomfortable to use. Fixing it is simple and saves money. Most loose covers only need basic adjustments or small part replacements. This section explains easy steps to secure the toilet seat cover firmly in place.
Tightening Screws And Hinges
Start by locating the screws that attach the seat to the toilet bowl. These are usually under the hinges at the back of the seat. Use a screwdriver to turn the screws clockwise. Tighten them gently until the seat stops moving. Avoid overtightening to prevent cracking the seat or porcelain.
Check the hinges for any looseness. Some models have plastic or metal hinges that can loosen over time. Tighten any bolts or nuts found there with a wrench or pliers. Make sure the seat lifts and lowers smoothly after tightening. This fixes the most common problems with loose covers.
Replacing Broken Fasteners
Broken fasteners cause the seat to detach or shift easily. Inspect the screws, nuts, and bolts for damage or wear. If they are cracked or stripped, remove them carefully. Take the old fasteners to a hardware store to find exact replacements.
Install the new fasteners by hand first, then tighten with tools. Use plastic caps or covers for a neat finish and to prevent rust. Test the seat by sitting and lifting it a few times. The cover should stay firmly attached and stable. Replacing fasteners keeps the toilet seat secure and safe
Finishing Touches
After repairing or replacing your broken toilet seat cover, the finishing touches help make it look smooth and neat. These steps improve the seat’s feel and appearance. The right finishing can extend the seat’s life and keep it comfortable to use.
Sanding And Smoothing
Once the adhesive or repair is dry, sand the fixed area gently. Use fine-grit sandpaper to smooth rough edges and excess glue. Sand in a circular motion to blend the repair with the rest of the seat. This step removes bumps and sharp spots that can cause discomfort. Wipe away dust with a clean, damp cloth before moving on.
Optional Painting For Appearance
Painting is an option to restore the toilet seat’s original look. Choose a paint made for plastic surfaces and water resistance. Apply thin, even coats with a small brush or spray. Let each coat dry fully before adding another. Painting hides visible repairs and refreshes the seat’s color. Skip painting if you prefer the natural look or if the seat is white and clean.
When To Replace Instead
Knowing when to replace a broken toilet seat cover saves time and effort. Some damages cannot be fixed properly. Replacing ensures safety and comfort. This section explains signs for replacement and how to choose the right new seat.
Extensive Damage Beyond Repair
Cracks that spread or break the seat frame need replacement. Loose hinges that cannot tighten pose risks. Deep scratches or worn-out surfaces are hard to fix. Repairing may cause more damage or discomfort. A new seat offers durability and safety.
Matching New Seat To Toilet Bowl
Toilet bowls come in different shapes and sizes. Choosing a seat that fits perfectly avoids leaks and instability. Measure the length, width, and bolt distance before buying. Match the shape: round or elongated seats fit specific bowls. Proper fit improves comfort and appearance.
Tips For Preventing Future Damage
Preventing future damage to your toilet seat cover saves time and money. Simple habits and regular care keep it sturdy and functional. Avoid repeated repairs by protecting the seat from stress and wear. Here are practical tips to help your toilet seat last longer.
Proper Usage Habits
Always sit gently on the toilet seat. Avoid standing or putting a heavy weight on it. Do not slam the seat down hard. Close it softly to prevent cracks or breaks. Teach children to use the seat carefully. Avoid using the seat as a step stool. These habits reduce pressure and damage over time.
Regular Maintenance Checks
Inspect the toilet seat regularly for loose screws or cracks. Tighten bolts if the seat feels wobbly. Clean the seat often with mild soap and water. Avoid harsh chemicals that weaken the plastic or wood. Check hinges and replace them if rusty or broken. Early repairs prevent bigger problems later. Small maintenance keeps your toilet seat safe and reliable.
Frequently Asked Questions
Can A Toilet Seat Cover Be Repaired?
A toilet seat cover with minor damage can be repaired using epoxy or strong adhesive. Clean, apply glue, clamp, and let it cure. For severe damage, replacement is best. Choose a seat matching your toilet’s shape and size for proper fit.
How To Fix The Lid Of A Toilet Seat?
Clean and dry the lid thoroughly. Apply epoxy or super glue to cracks. Clamp if needed and let it cure. Sand smooth for a neat finish. Replace the lid if damage is severe.
How To Fix A Cracked Toilet Seat Cover?
Clean and dry the cracked area thoroughly. Apply two-part epoxy or super glue mixed with baking soda. Clamp if possible and let it cure. Sand smooth once dry. Replace the seat if damage is severe.
How To Fix A Broken Plastic Toilet Seat?
Clean and dry the cracked seat thoroughly. Apply two-part epoxy or super glue mixed with baking soda. Clamp if needed and let cure. Sand smooth for a seamless finish. Replace the seat if damage is severe or repair fails.
Conclusion
Fixing a broken toilet seat cover is simple and cost-effective. Clean the damaged area well before applying adhesive. Use epoxy or super glue with baking soda for a strong bond. Allow the repair to dry fully for the best results. For large cracks, replacing the seat may save time.
Always choose a seat that fits your toilet’s shape and size. With these easy steps, your toilet seat will be sturdy again. No need to call a plumber or buy expensive tools. Save money by fixing it yourself today!
3 Responses