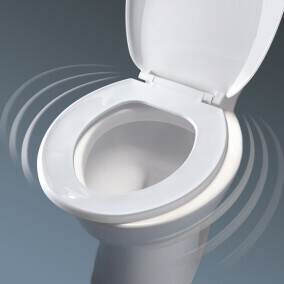
How to Fix Commode Seat Cover, cracked, or simply not fitting right? You’re not alone, and the good news is that fixing it doesn’t have to be complicated or expensive.
Whether your seat cover wobbles every time you sit down or the hinges feel worn out, you can handle the repair yourself with just a few simple tools and easy steps. Imagine saving money and avoiding the hassle of calling a plumber—while getting your bathroom back to perfect working order in no time.
Keep reading, and you’ll discover straightforward tips and tricks to fix your commode seat cover quickly, so it feels sturdy, secure, and comfortable once again.

Types Of Commode Seat Covers
Commode seat covers come in various types to suit different needs and preferences. Choosing the right cover can make cleaning and maintenance easier. Each type offers unique benefits for hygiene and comfort. Understanding these types helps you pick the best option for your bathroom.
Disposable Paper Covers
Disposable paper covers are thin and made for one-time use. They provide a quick, hygienic barrier between you and the seat. These covers are popular in public restrooms. After use, simply throw them away. They are lightweight and easy to carry for travel.
Reusable Cloth Covers
Reusable cloth covers are soft and designed for home use. They offer comfort and warmth compared to plastic seats. These covers can be washed and reused many times. They come in different colors and patterns. Cloth covers help reduce waste but need regular cleaning.
Standard Plastic Seats
Standard plastic seats are the most common type of commode covers. They are durable, easy to clean, and resist stains. These seats often have a smooth surface that prevents dirt buildup. Plastic seats can last for years with proper care. They fit most toilet models and come in various shapes.
Tools Needed For Repairs
Fixing a commode seat cover requires a few basic tools. These tools help remove old parts and install new ones. Having the right tools makes the process smooth and fast. Below are the essential tools needed for a successful repair.
Screwdrivers And Wrenches
Screwdrivers come in different types, mainly flathead and Phillips. Use the correct type to avoid stripping screws. A wrench or an adjustable spanner helps to loosen or tighten nuts. Both tools are necessary to remove old bolts and secure new ones.
Replacement Bolts And Nuts
Old bolts and nuts may be rusty or damaged. Having replacements ready speeds up the repair. Choose bolts and nuts that fit your toilet model. Stainless steel options resist rust and last longer.
Cleaning Supplies
Cleaning the seat and surrounding area improves the repair quality. Use mild soap and water to remove dirt and grime. A scrub brush or cloth helps clean hard-to-reach spots. Dry the area before installing new parts to prevent slipping.
Removing The Old Seat Cover
Removing the old commode seat cover is the first step in fixing or replacing it. This process makes sure the new seat fits properly and works well. Take your time to carefully remove all parts. Keep the area clean for the new seat to stay secure. Below are simple steps to help you remove the old seat cover safely and easily.
Lifting Hinge Caps
Start by locating the hinge caps at the back of the seat. These small covers hide the screws that hold the seat in place. Use a flathead screwdriver or your fingernail to gently lift the caps. Be careful not to damage them. Once lifted, you will see the screws underneath. This step helps expose the hardware for removal.
Unscrewing Hardware
Use a screwdriver to unscrew the bolts under the hinge caps. Hold the nuts below the toilet bowl with pliers if they are tight. Turn the screws counterclockwise to loosen. Remove both screws to release the seat. Keep the screws and nuts in case you need them later. Removing the hardware frees the seat for cleaning or replacement.
Cleaning The Seat Area
After removing the seat, clean the toilet rim and hinge area thoroughly. Use a mild cleaner and a cloth to wipe away dirt and grime. Dry the area well before installing a new seat. A clean surface ensures the new seat stays stable and prevents odors. Proper cleaning also helps spot any damage to the toilet bowl.
Fixing Loose Hinges And Screws
Loose hinges and screws cause the commode seat cover to wobble or shift. Fixing these issues improves comfort and safety. Basic tools like a screwdriver can help secure the seat quickly. This section explains how to tighten screws, replace broken hinges, and secure hidden fixings.
Tightening Screws
Locate the screws holding the seat to the toilet bowl. Use a Phillips head screwdriver to turn them clockwise. Tighten until the seat stops moving but avoid over-tightening. Check both hinges for loose screws. Repeat the process if the seat still feels loose.
Replacing Broken Hinges
Remove the old seat by unscrewing the damaged hinges. Purchase new hinges compatible with your commode seat. Align the new hinges with the holes on the toilet. Secure them tightly with screws. Test the seat for stability and adjust if needed.
Securing Hidden Fixings
Some commode seats use hidden fixings under small caps. Pry off the caps gently with a flathead screwdriver. Tighten the screws beneath using the correct screwdriver. Replace the caps after securing the screws. This method keeps the seat firmly in place and improves appearance.
Installing A New Seat Cover
Installing a new commode seat cover refreshes your bathroom quickly. It is a simple task that anyone can do with basic tools. Follow the steps carefully to ensure a firm and comfortable fit. Use the right parts and avoid forcing any piece. This will help your seat last longer and stay secure.
Aligning The Seat
Place the new seat over the toilet bowl. Make sure the holes on the seat match the holes on the toilet. Align the seat so it sits straight and balanced. Adjust until the seat is centered and stable on the bowl.
Inserting Bolts And Nuts
Insert the bolts through the holes in the toilet and seat. Hold the nuts underneath the toilet to catch the bolts. Hand-tighten the nuts at first to keep the seat in place. Check that both bolts and nuts fit correctly and are not cross-threaded.
Snugging Without Overtightening
Use a screwdriver to tighten the bolts carefully. Tighten until the seat feels firm and does not move. Avoid overtightening, which can crack the toilet or seat. Stop tightening when the seat is secure but still slightly adjustable.
Closing Hinge Caps
Snap the hinge caps over the bolts to hide them. Press firmly until the caps click into place. The caps protect the bolts from dirt and moisture. They also give the seat a clean, finished look.

Attaching Reusable Cloth Covers
Attaching reusable cloth covers to a commode seat offers comfort and hygiene. These covers are easy to put on and remove for washing. Proper attachment ensures the cover stays in place during use. Below are simple methods to secure your cloth cover efficiently.
Stretching Over The Seat
Start by holding the cloth cover by its edges. Stretch it evenly over the commode seat, covering all sides. Make sure the fabric lays flat without wrinkles. The cover should fit snugly without being too tight. This method works best with stretchy materials. Check that the cover does not shift when pressed.
Using Elastic Or Snaps For Fit
Elastic bands help keep the cover securely attached. Sew or attach elastic around the cover’s edge. This allows the cover to grip the seat firmly. Snaps are another option for a tidy fit. Attach snaps to the cover and the seat rim if possible. Both elastic and snaps prevent slipping and improve comfort. Choose the method that matches your cover and seat style.
Placing Disposable Paper Covers
Placing disposable paper covers on a commode seat is simple and hygienic. These covers create a barrier between you and the seat. They help keep the toilet clean and provide peace of mind in public restrooms.
Follow these easy steps to place the cover properly. Proper placement ensures the cover stays in place and flushes away easily after use.
Unfolding And Positioning
Take the paper cover and unfold it carefully. Avoid tearing the thin paper. Lay the cover flat over the toilet seat. Make sure the cover fits the shape of the seat. Smooth out any wrinkles to prevent slipping.
Ensuring Flap Faces The Bowl
The flap is a small part of the cover hanging over the seat edge. Position this flap so it faces the toilet bowl. This flap helps the cover stay in place. It also allows the cover to flush down easily after use.
Flushing For Disposal
After using the toilet, flush the paper cover down. The flap helps the cover move with the water. Do not force the cover if it does not flush easily. Dispose of the cover properly if the toilet cannot flush paper covers.
Maintenance Tips For Longevity
Proper care helps your commode seat cover last longer. Simple steps keep it clean and sturdy. Regular checks stop small problems from growing. Follow these easy maintenance tips to protect your seat cover.
Regular Cleaning
Clean the seat cover often with mild soap and water. Avoid harsh cleaners that can damage the surface. Use a soft cloth or sponge to wipe gently. Dry the seat well to prevent moisture buildup. This keeps the seat fresh and free from stains.
Checking Hardware Periodically
Look at screws and hinges every few weeks. Tighten any loose parts to keep the seat stable. Replace worn or broken hardware quickly to avoid damage. Small fixes improve safety and comfort. Use a screwdriver to make adjustments easily.
Avoiding Excessive Force
Handle the seat cover with care to avoid cracks. Do not slam the lid or apply heavy pressure. Gently lowering the seat extends its life. Teach all users to treat the seat gently. This simple habit prevents unnecessary repairs and replacements.
Frequently Asked Questions
How To Fix A Broken Toilet Seat Cover?
To fix a broken toilet seat cover, first remove the old seat by unscrewing bolts. Align the new seat, insert bolts, and tighten securely. Ensure hinges and bumpers lock in place for stability. Check for any loose parts and adjust screws as needed.
How To Fix A Toilet Seat Lid That Keeps Falling Off?
Tighten loose hinges using a screwdriver under the seat. Replace worn screws or bolts. Ensure hinge caps snap securely. Clean and align the seat properly to prevent falling. Replace the seat if damaged.
How To Fix Toilet Seat Hinge Plastic?
To fix a plastic toilet seat hinge, tighten loose screws or replace broken parts. Snap hinge covers back securely. Use a screwdriver to adjust or replace damaged hinges for stability.
How To Repair A Toilet Seat With Hidden Fixings?
Lift the hinge caps to reveal hidden screws. Use a Phillips screwdriver to tighten or replace screws. Secure the seat firmly.
Conclusion
Fixing a commode seat cover is simple with the right steps. Tighten screws carefully to avoid damage. Replace broken parts for better support and comfort. Using basic tools saves time and money. Regular checks keep your seat secure and safe.
Follow these tips to enjoy a steady commode seat. Maintenance is easy and improves bathroom hygiene. Try these steps today for a quick fix.
3 Responses