
When your car’s seat cover tears, it’s more than just an eyesore. A torn seat cover can lower your car’s value, make driving uncomfortable, and even lead to further seat damage if left unrepaired. But the good news? You don’t always need a professional or expensive tools to fix it. With some basic knowledge, a few supplies, and a careful approach, you can restore your seat covers and keep your car looking great.
This guide takes you step-by-step through how to fix torn seat covers. Whether your car has fabric, leather, or synthetic seats, you’ll find practical advice, real-world examples, and tips that many beginners miss. By the end, you’ll know how to assess the damage, pick the right repair method, and apply a fix that lasts.
Understanding The Types Of Seat Covers And Materials
Before you begin, it’s essential to know what you’re working with. Seat covers come in various materials, each with different repair needs.
Common Seat Cover Materials
- Cloth/Fabric: Soft, comfortable, and common in many vehicles. Tears are usually easy to fix but may show stitches.
- Leather: Luxurious and durable but prone to cracking or splitting over time. Repairs require special care to blend with the original look.
- Vinyl/Synthetic Leather: Affordable and water-resistant. Repair kits are widely available, but color-matching can be tricky.
- Suede/Alcantara: Soft and stylish, but sensitive to glue and heat. Often found in high-end cars.
How Material Affects The Repair
Cloth seat repairs are often about reinforcing the area, while leather and vinyl focus on blending the patch and texture. Suede needs gentle handling to avoid stains or marks. Knowing your seat’s material helps you choose the best tools and avoid common mistakes, like melting synthetic covers with too much heat.
Assessing The Damage: How Bad Is The Tear?
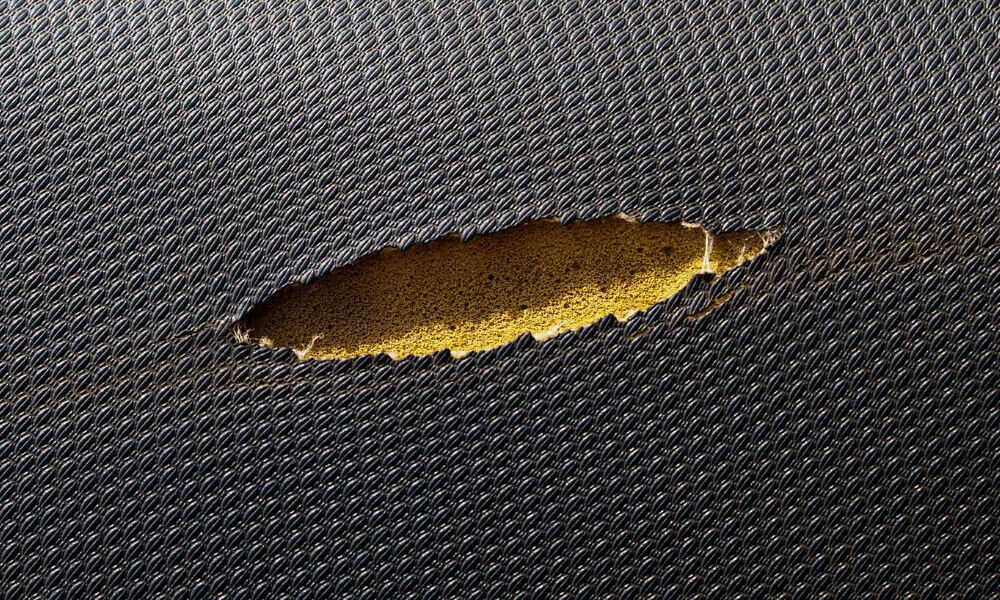
Not all tears are the same. Understanding the type and size of the damage is the first step to choosing the right repair method.
Types Of Tears And Holes
- Small Cuts or Nicks: Less than 2 inches, usually from sharp objects.
- Medium Tears: 2-6 inches, sometimes from wear or pet claws.
- Large Rips or Holes: More than 6 inches, often from accidents or severe wear.
- Seam Tears: Along the stitched seams of the cover.
- Burn Holes: Usually from cigarettes or hot objects, often less than an inch.
Why Accurate Assessment Matters
If you use a simple patch on a large tear, it may not hold. Trying to sew a burn hole can make things worse. Take a moment to measure the damage and check the area around the tear for weakness.
Look for stretched fabric or missing foam underneath, which may need extra attention.
Gathering The Right Tools And Materials
Preparation is key for a smooth, lasting repair. Here’s what you’ll typically need, with variations depending on your seat material.
Essential Tools
- Scissors: Sharp enough to cut fabric or patches cleanly.
- Upholstery Needle and Thread: For sewing repairs, especially on fabric.
- Fabric Glue or Leather Adhesive: Bonds the patch or repair material.
- Patch Material: Matching fabric, leather, or vinyl.
- Seam Ripper: For fixing seam tears.
- Sponge or Cloth: To clean the area before repair.
- Color Repair Compound: For leather and vinyl, to blend the patch.
- Heat Tool: Sometimes needed for vinyl and leather kits.
Optional But Useful
- Foam Padding: To replace lost seat cushioning.
- Sandpaper: For smoothing rough edges on leather/vinyl.
- Tweezers: To position small patches or threads.
Pro Tip: Many beginners overlook color-matching. Always try to find a patch that matches your seat, or use a repair compound to blend the repair. Even small color differences stand out on car interiors.
Cleaning And Preparing The Damaged Area
No matter the repair method, start with a clean surface. Dirt, oil, or crumbs can prevent glue from sticking or make sewing harder.
- Vacuum the Seat: Remove all loose debris around and inside the tear.
- Clean With Mild Soap: Use a damp cloth and mild soap (no harsh chemicals). For leather, use a leather cleaner.
- Dry Completely: Wait until the area is totally dry before starting repairs.
- Trim Loose Threads or Edges: Snip away any frayed fabric for a neater result.
Common Mistake: Skipping cleaning. Even invisible dirt can ruin a repair, causing glue to fail or patches to peel.
Repairing Small Tears And Cuts
Small tears (under 2 inches) are the easiest to fix and often don’t require professional help.
Fixing Small Tears In Cloth Or Fabric
- Apply Fabric Glue: Squeeze a small amount into the tear and press the edges together.
- Hold in Place: Use clips or tape to keep edges together while drying.
- Let It Cure: Wait as directed (usually a few hours) before using the seat.
This method keeps the repair almost invisible and restores strength.
Fixing Small Tears In Leather Or Vinyl
- Clean and Sand Lightly: Gently sand the edges for better adhesion.
- Use Repair Compound: Apply a thin layer with a spatula.
- Texture and Color: Many kits include a grain pad and color compound to match your seat’s finish.
- Heat-Set if Needed: Some kits require gentle heat to cure the compound.
Insight: Small tears can sometimes grow if not fixed. Even a 1-inch nick may widen with regular use, so quick action saves more work later.
Repairing Medium And Large Tears
Larger tears (2 inches or more) need extra support and a careful approach to avoid the repair failing over time.
Fabric And Cloth Seat Repair
- Cut a Patch: Use matching fabric, making the patch about 1 inch bigger than the tear on all sides.
- Insert Under the Tear: Slide the patch behind the tear so it sits under the original fabric.
- Apply Fabric Glue or Sew: For a strong hold, use both glue and a few stitches around the edge.
- Press and Secure: Weigh the area down or use tape until the glue sets.
Leather And Vinyl Seat Repair
- Prepare a Sub-Patch: Cut a thin piece of fabric or vinyl to fit under the tear.
- Insert and Glue: Slide the sub-patch under the seat cover, apply adhesive, and press the torn edges onto it.
- Apply Filler: Use a leather/vinyl repair filler to blend the surface.
- Color and Texture: Match the color with a repair kit; use a grain pad for texture.
- Cure: Let it dry as directed (some kits need a heat tool).
Reinforcing Weak Areas
If the area around the tear is thin or stretched, reinforce it with extra glue or a larger patch. This prevents future tears next to your repair.
Non-obvious Tip: Always round the corners of your patch. Sharp patch corners can peel up over time, but rounded corners stay stuck and look better.
Repairing Seam Tears
Seam tears are common, especially on older seats. These are tears that run along the original stitching.
How To Fix Seam Tears
- Open the Seam Slightly: Use a seam ripper to give yourself space to work, but don’t make the tear bigger than needed.
- Thread the Needle: Use strong upholstery thread that matches your seat color.
- Sew Carefully: Start about 1 inch before the tear and continue 1 inch after, using a backstitch for strength.
- Tie Off and Hide the Knot: Hide the knot inside the seam for a neat look.
- Optional Glue: Add a little fabric glue inside the seam for extra strength.
Beginner Insight: Pull the thread too tight, and you can pucker or wrinkle the seat. Keep stitches snug but not overly tight for a smooth finish.
Repairing Burn Holes
Burn holes are especially tricky because the edges are often hard and melted.
How To Fix Burn Holes In Fabric
- Trim the Burnt Edge: Carefully cut away melted material.
- Insert a Small Patch: Use matching cloth or a scrap from under the seat.
- Glue and Blend: Secure with fabric glue, and gently brush the fibers to blend.
How To Fix Burn Holes In Leather/vinyl
- Clean and Sand: Remove any hard edges.
- Fill With Compound: Use a leather/vinyl repair compound to fill the hole.
- Color Match: Use the kit’s color compounds to match your seat.
- Texture: Press a grain pad into the compound before it dries.
Real-world Example: Burn holes from cigarettes are usually small but very visible. Even a good repair may show a slight color or texture change, but it prevents the hole from growing.
Using Professional Repair Kits
Many stores sell seat repair kits designed for DIY use. These kits can save time and include everything you need, but results vary.
What’s Inside A Typical Kit
- Adhesive or Glue
- Color Compounds
- Patches (Fabric, Leather, or Vinyl)
- Texturing Tools
- Small Heat Tool (sometimes)
How To Use A Repair Kit
- Read Instructions Carefully: Kits differ, so always follow the steps provided.
- Test Colors First: Use a hidden spot to make sure the color matches.
- Apply in Thin Layers: Especially with filler or color compounds. Thick layers may crack.
- Use Texture Pads: Press gently to mimic your seat’s original look.
Comparing Diy Kit Results
Here’s how DIY repair kits compare to other methods:
| Method | Durability | Appearance | Skill Needed | Cost |
|---|---|---|---|---|
| DIY Repair Kit | Moderate | Good (if matched well) | Low-Medium | $10-$30 |
| Professional Repair | High | Excellent | Professional | $75-$200 |
| Basic Glue/Sewing | Low-Moderate | Visible Repair | Low | Under $10 |
Insight: Kits are perfect for quick, cost-effective fixes, but may not blend perfectly on luxury seats. For classic or expensive cars, professional repair may be worth the extra cost.
Replacing Lost Foam Or Padding
Sometimes a tear exposes or damages the foam under your seat cover. Ignoring this can lead to discomfort and further seat damage.
How To Replace Foam
- Remove Damaged Foam: Cut away any crumbling or compressed padding.
- Cut New Foam: Use high-density foam, cut slightly larger than the space.
- Insert and Shape: Slide it under the cover and shape it by hand.
- Glue in Place (if needed): Use spray adhesive for a secure fit.
- Repair the Cover: Continue with your chosen patch or sewing method.
Common Mistake: Using low-density foam. Cheap foam flattens quickly, making your repair useless. Invest in good quality foam for long-term comfort.
Matching Color And Texture
One of the hardest parts of seat repair is making the patch blend in. Even a strong repair can look bad if the color or texture is wrong.
How To Match Color
- Use a Repair Kit: Most leather/vinyl kits include several colors to mix.
- Test First: Always blend colors and test on a hidden spot.
- Fabric Patches: Use material from under the seat if possible for a perfect match.
How To Match Texture
- Texture Pads: Press while the repair compound is wet to copy the seat’s original grain.
- Brushing: For fabric, gently brush fibers over the patch to help it blend.
Real-world Challenge
Matching old, faded seats is tough. If your seats are sun-bleached or stained, the best match may still be slightly off. In these cases, focus on durability first—better a solid patch than a perfect color that doesn’t last.
When To Consider Professional Help
Some repairs are best left to the experts. Here’s when you should consider hiring a pro:
- Large Tears: Over 6 inches, especially on leather seats.
- Complex Damage: Multiple holes, burn marks, or seam failures.
- Luxury or Classic Cars: To keep the car’s value and appearance.
- Airbag Seats: Many modern seats have side airbags. Repairing these yourself can be dangerous if you don’t know what you’re doing.
Professional shops have industrial tools, perfect color-matching, and can often make repairs invisible. Expect to pay more, but the results may be worth it.

How To Prevent Future Tears
After repairing your seat, it’s smart to prevent new damage. Small habits make a big difference.
- Use Seat Covers: Universal or custom-fit covers protect original seats from wear, spills, and sun.
- Clean Regularly: Dirt and grit act like sandpaper, wearing out the cover.
- Avoid Sharp Objects: Don’t carry keys, tools, or sharp items in your pockets or on the seat.
- Condition Leather: Use a good conditioner every few months to keep leather supple.
- Protect From Sun: Park in the shade or use sunshades. UV rays weaken seat material over time.
- Careful With Pets: Use a pet seat cover or blanket for dogs or cats.
Data Point: According to the National Highway Traffic Safety Administration, regular seat maintenance can extend seat cover life by up to 50%.
Comparing Repair Methods: What’s Best For You?
Choosing the right repair method depends on your seat type, the size of the tear, and your skill level. Here’s a quick comparison to help you decide:
| Repair Method | Best For | Time Required | Tools Needed |
|---|---|---|---|
| Fabric Glue | Small tears in fabric | 30 minutes + drying | Glue, clips |
| Sewing | Seam tears, cloth seats | 1–2 hours | Needle, thread |
| Leather/Vinyl Kit | Small to medium tears, burns | 1–2 hours | Kit tools |
| Professional Repair | Large tears, classic cars | 2–24 hours | None (shop handles it) |
Quick Tip: For daily drivers, a good DIY kit or careful sewing often gives years of extra seat life. For show cars or high-value vehicles, consider a professional.
Step-by-step Example: Fixing A Medium Cloth Seat Tear
Let’s walk through a real-world repair. Imagine you have a 4-inch tear in a cloth car seat.
- Clean the Area: Vacuum and wipe with mild soap. Dry completely.
- Cut a Patch: Use matching fabric, 6 inches long and 2 inches wide.
- Insert Patch: Slide the patch under the tear, making sure it covers the whole area.
- Apply Fabric Glue: Put glue around the edge of the patch and press the torn seat edges onto it.
- Secure: Use tape or a heavy object to hold the patch in place for 2–4 hours.
- Blend Fibers: Once dry, gently brush the seat to blend the repair.
Result: The tear is reinforced and the seat is comfortable again. The repair line may be slightly visible, but it’s far better than the original tear.
Two Overlooked Secrets To A Long-lasting Repair
- Patience Pays Off: Rushing drying times is the biggest cause of failed repairs. Always wait for glue or compound to fully cure before using the seat.
- Regular Inspection: Check your seats every few months for early signs of wear or small tears. A quick fix now can prevent a big, expensive repair later.
Frequently Asked Questions
How Long Does A Seat Cover Repair Last?
A seat cover repair can last several years if done correctly. The durability depends on the method, the materials used, and how much stress the area gets. DIY repairs usually last 1–3 years, while professional fixes may hold for the life of the car.
Can I Repair Leather Seat Covers Myself?
Yes, small tears or cracks in leather seat covers can be fixed at home with a repair kit. For larger tears or matching complex textures, professional help gives a more seamless result.
What If The Tear Is Near An Airbag?
Modern seats often have side airbags. Never repair or sew over airbag seams yourself, as this can affect airbag deployment and safety. Always consult a professional for these repairs.
Will A Repaired Seat Cover Lower My Car’s Resale Value?
A well-done repair is better than a visible tear and usually doesn’t hurt resale value. However, a poor repair or mismatched patch can make things worse. If you plan to sell, consider professional repair or a high-quality DIY job.
Where Can I Find Repair Kits And Matching Patches?
You can find seat repair kits and fabric patches at auto parts stores, online retailers, or upholstery shops. For high-end or rare cars, check with your dealership or visit Wikipedia for more details on seat types and materials.
A torn seat cover doesn’t have to ruin your car’s look or comfort. With the right tools, some patience, and the guidance above, you can restore your seat and enjoy your drive again. Regular care and quick fixes will keep your car’s interior looking sharp for years to come.